How-To:
How To Refinish Your SAAB Floor Pan
If your vintage Saab still has it's original factory undercoat, its time to refinish the cars floor pan with a fresh coat of paint, new seam sealer and undercoat. Saab floor pans are of a monocoque design, multiple pieces of flat and corrugated steel are spot and arc welded together to form a ridged unit without the use of a conventional frame. The monocoque design provides superior strength and light weight- a perfect combination for a small automobile. Unfortunately, this design also provides the perfect design for rust.
After the undercoat and seam sealer deteriorate, water can enter the many panel seams. Through capillary action, the water travels the full length of the seam. To make matters worse, Saab applied the seam sealer over raw metal, so there is nothing to inhibit the formation of rust in these areas.
Preparation:
Body removal is not necessary, but will certainly make for an easier and more thorough job. If working on a Sonett, I suggest removing the entire body, go to the article about Sonett body removal for complete body removal instructions. If working on a 93, 95 or 96, remove all four fenders before starting.
Drive the car onto a plastic sheet or tarp. A hard level surface is a must. Jack up the car to the desired height, keeping in mind you will be spending dozens of hours under the car looking up. Safety should be your primary concern; the car must be able to withstand the forthcoming beating, banging, scraping and cursing without shifting on the jack stands or blocks.
Remove the exhaust system and wheels. If the body has not been removed, cover the car with a suitable tarp to protect the paint finish. Undercoat removal can be accomplished in several ways. Some methods are much better than others. The following is a brief overview of the most commonly used methods:
The Torch Method
Heat the undercoat with a torch until it begins to melt, then scrape away with a putty knife. Aside from the serious fire hazard, toxic fumes, risk of burns and sticky mess, this is a great way to go.... NOT! Save the torch for plumbing jobs.
The Sandblast Method
Sandblasters can be rented by the day or you can hire someone to come to your home and do the job for you. Sandblasting is a quick and thorough way to remove undercoat, albeit dusty. You must methodically cover all areas you do not want the sand to reach. If your floor pan has any rust holes, sandblasting will surely find them.

The Degreaser Method
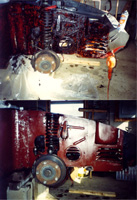
Spray liberal amounts of "Gunk" or diesel fuel onto the undercoat. Apply once a day for about four days. After awhile the undercoat will literally begin to drip off the floor pan. Now you know why your car is parked on plastic. Using a sharp putty knife, scrape off the undercoat. Degreasers give off very strong fumes, so keep the work area well ventilated. Click on the image at your left for a look at how this method works. Gunk was used on this 1968 Sonett II V4 to soften the undercoat. No rust was found. The car was originally from California.
The Paint Remover Method
Buy a gallon of commercial quality paint remover from an auto parts store. You will also need a chemical resistant brush, rubber gloves and goggles. Apply the paint remover, wait approximately 30 minutes and scrape off with a sharpened putty knife. A second application of paint remover will be necessary to reach bare metal. Wipe the second coat off with rags instead of the putty knife.
Heat Gun Method
Using a heat gun, heat the undercoat until it can be scraped off with a putty knife. Wear leather gloves and goggles; be careful not to melt any wires in the passenger compartment.

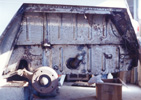
Click the photo for a closer look at what you may find hiding under all of that old undercoat.
Undercoat Residue Removal
Regardless of how you remove the undercoat, there will be small amounts of undercoat residue left on the floor pan. To remove the residue, wipe an alcohol based metal preparation like "Klenz Eazy" available from NAPA on the pan with a rag. The undercoat will come right off. If you're looking for a more environmentally friendly method, buy a citrus-based degreaser instead. Citrus-based degreasers are not as strong as the more toxic varieties, but they will get the job done nicely.
Seam Sealer Removal
Seam sealer can be found in the passenger compartment as well as the underside of the car. After removing the undercoat, its time to remove all of the old seam sealer. Using a wood chisel and hammer, chip and scrape out the seam sealer. Take your time, removing the sealer from deep within the seams. Once the seam sealer is removed, clean the seams with an alcohol based metal preparation, paint thinner or Citrus-based cleanser.
Treating The Seams
The seams should be treated with rust stabilizer. Rust stabilizers chemically "kill" rust, preventing future corrosion. The stabilizer should be brushed in, penetrating the seams. The stabilizer should also be applied to any surface rust found on the pan. If your pan has loose flaking rust it will be necessary to remove it with a wire wheel or sander before applying the stabilizer. If you find areas that have rusted through, go to the article about wleding your floor pan to learn how to repair these areas. Recommended rust stabilizers are: Miracle Paint by Bill Hirsch Products @ $24 per quart plus shipping (call 1-800-828-2061) and POR 15 @ $29 per quart including shipping (call 1-800-777-6715). Make sure you wear gloves during application and allow the stabilizer cure per the manufacturers instructions. Rust stabilizers will not stick to smooth clean metal, apply the stabilizer to rusty areas only.
Primer
The floor pan should be painted with primer before applying new seam sealer. Aerosol spray primers will get the job done but for maximum rust prevention a high quality brush on primer should be used. Recommended primer coatings are: Super Black Chassis Paint by Bill Hirsch Products @ $21.95 per quart plus shipping (call 1-800-828-2061), Zinc Chromate Paint, available from most automotive stores will also provide excellent protection.
Seam Sealer
The next step is to apply the new seam sealer. Seam sealer is available from auto parts stores in two varieties; brush-on purchased by the quart and caulking gun style, purchased by the tube. To smooth out the seam sealer after application; put on a rubber glove, dip your finger in paint thinner and rub the seam sealer. Allow the sealer to cure per the manufacturers instructions.

Painting The Floor Pan
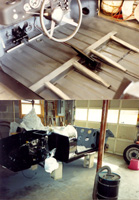
Now it's decision time. You can sand the primer and apply a coat of paint and clear coat for a concours quality finish, or you can spray on undercoat for a stock appearance. A painted floor pan will require routine waxing and touch ups. It will also result in increased road noise. Undercoat on the other hand is easy to apply, reduces road noise, but can actually conceal future rust formation. Undercoat can be purchased in aerosol cans in two varieties, rubberized and non-rubberized. I recommend the rubberized as it applies more evenly and dries faster than non-rubberized. Click on the image on the right for a look at a 1968 Sonett II V4 which received a concours-quality paint job on the floor pan, instead of new undercoat.
After completion, annual inspections and minor touch ups should be all your car needs to remain rust free for many years to come.
Bruce Turk, 5/02


